
The simplest example#
Now that we have modelx ready for our exercise and we understand the basics of modelx objects, we are going to model the Fibonacci sequence as the first example.
The Fibonacci sequence is an integer sequence that starts with 0, 1 and the numbers after that are obtained by adding the last and second-to-last numbers.
The Fibonacci sequence can be expressed as the following recursive formula.
Below are the Fibonacci numbers up to n=10.
n |
0 |
1 |
2 |
3 |
4 |
5 |
6 |
7 |
8 |
9 |
10 |
F(n) |
0 |
1 |
1 |
2 |
3 |
5 |
8 |
13 |
21 |
34 |
55 |
In modelx term, we call n the parameter, 0, 1, 2, 3... the arguments,
and 0, 1, 1, 2, 3, ... the values of the formula.
Through this exercise, we are going to learn how to perform basic operations in modelx.
Creating a Cells and defining its Formula#
Find MxExplorer widget in your Spyder IDE.
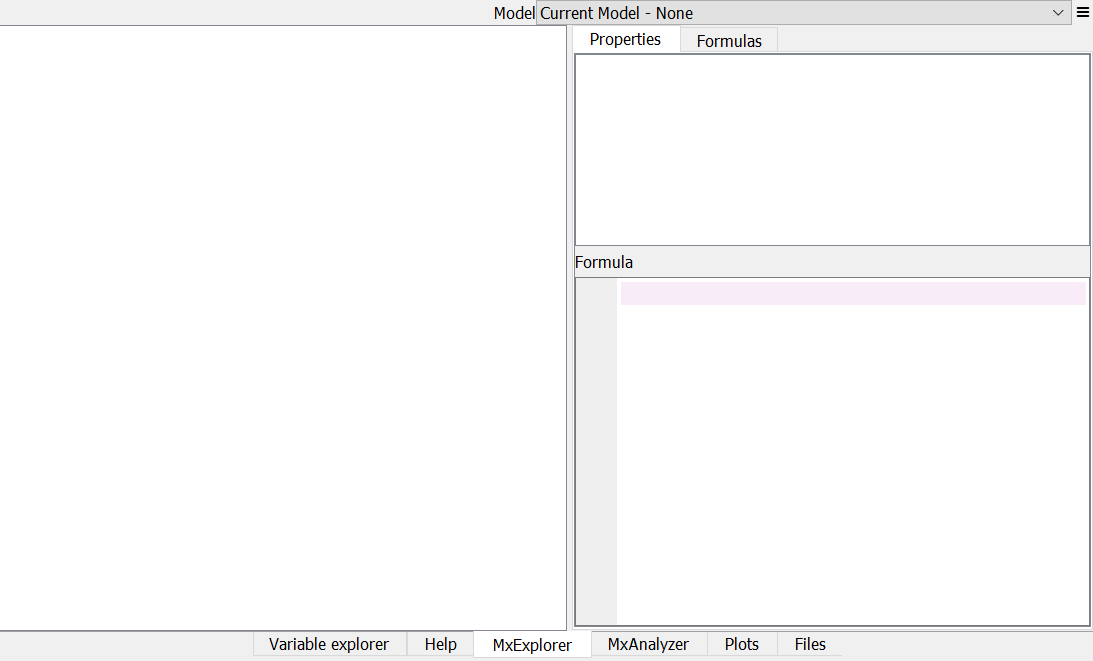
Blank MxExplorer#
Near the top right corner there is a list box titled Model. This box is for selecting the model to show in the panes below. Since we don’t have models yet, Current Model - None is displayed.
The blank pane on the left hand side is for showing the tree of the objects in the selected model.
Right click on the blank space in MxExplorer then a context menu shows up. Select Create New Cells item in the menu.
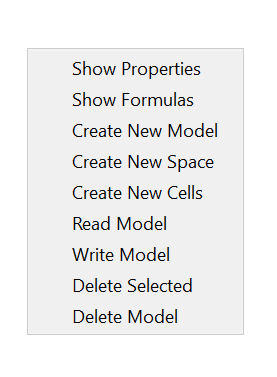
ContextMenu in MxExplorer#
A dialog box for creating a new Cells pops up.
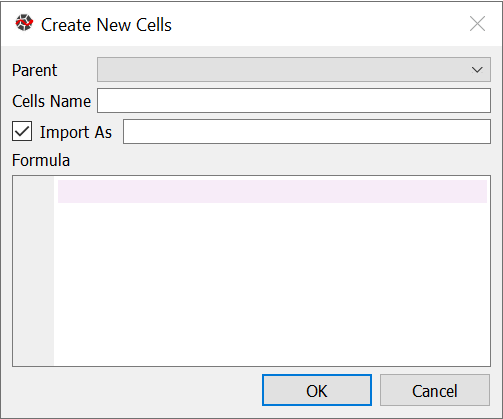
New Cells Dialog Box#
The dialog box has 3 line boxes labeled Parent, Cells Name, Import As and it also has one check box before Import As and a code editor box titled Formula at the bottom. By default, the text line boxes are all blanks, and the check box is checked.
The Parent box is for selecting the parent Space of the Cells we are
going to create. The parent Space of a Cells is the Space that
contains the Cells. Since we don’t have any Models or Spaces yet,
no item is listed in this box. For this exercise, you can just leave the
box as is, because when the Cells is created, the Model and Space
to contain the Cells are created automatically with their default names
Model1 and Space1.
The Cells Name box is for specifying the Cells name.
If the box is left blank, then the Cells name is taken from the
function definition entered in the Formula box.
You can leave the Cells Name box blank, because
later we are writing a function definition in the Formula box
and naming the function Fibo, so the Cells will be named Fibo as well.
The check box preceding Import As label is for indicating whether you want to import the new Cells into the global namespace of the IPython session in the associated MxConsole, and the line box next Import As label is for specifying the global variable’s name. If it’s left blank, then the variable name is set to the Cells name.
If you leave the check box checked, then to get the Cells Fibo
in the MxConsole, you can just type:
>>> Fibo
If you uncheck the box, then to get the Cells Fibo,
you need to type:
>>> mx.Model1.Space1.Fibo
So checking the box has the same effect as executing the assignment statement below:
>>> Fibo = mx.Model1.Space1.Fibo
You don’t need to edit them for this example, so leave them as they are. you only need to edit the Formula box.
There are several ways to write a function that returns the Fibonacci numbers. For this example, we use the following definition. Write the following code in the Formula box then click OK:
def Fibo(n):
    if n > 1:
        return Fibo(n-1) + Fibo(n-2)
    else:
        return n
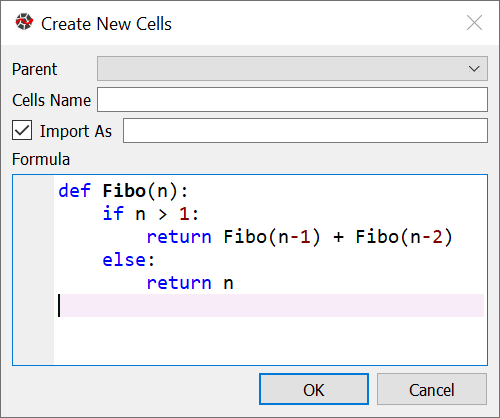
New Cells Dialog Box#
Now you can see that the selected text in the Model box
is changed to Current Model - Model1.
On the left-hand side in MxExplorer, you have an item named Space1.
This means that modelx created a new model named Model1 and a UserSpace
object named Space1 in the Model1 model.
Double-click on the item Space1 and you will see an item named Fibo,
under Space1.
Select Fibo and right-click to bring up the context menu. Select Show Properties from the context menu, then you will see the formula in the bottom right pane.
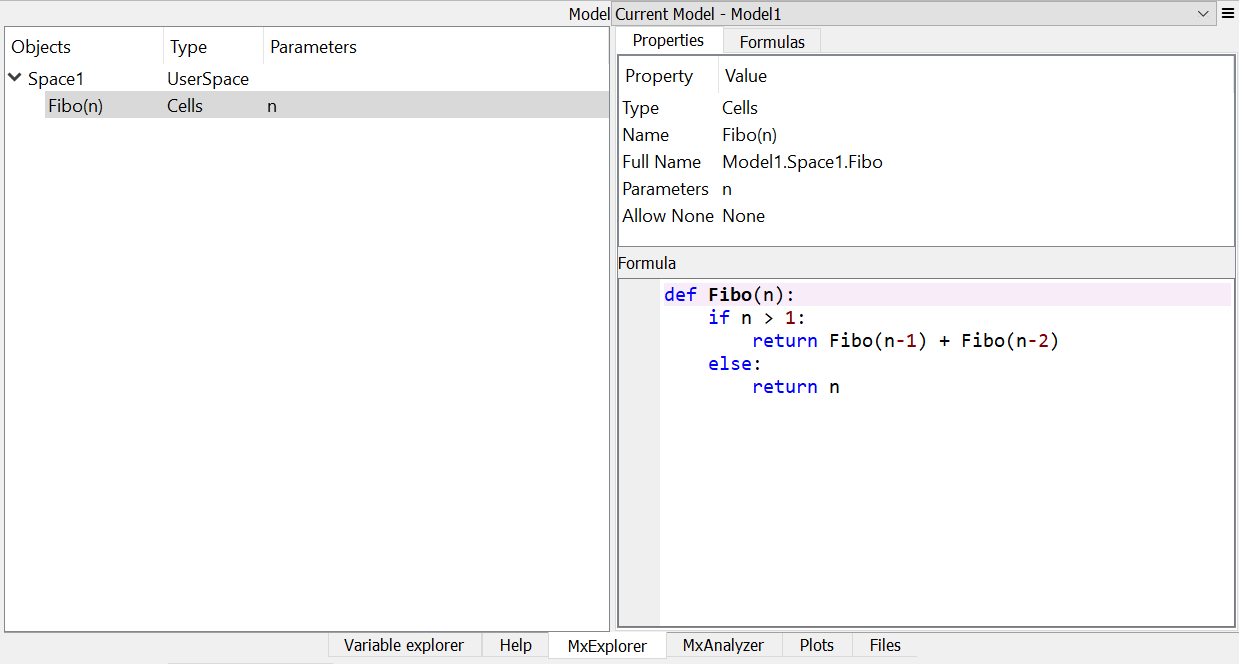
MxExplorer#
Getting calculated results#
The Cells Fibo does not have values yet right after it is created.
We use MxConsole to access the Cells object Fibo.
Remember that we left the check box next to Import AS checked in
the dialog box when we created the Cells Fibo, while we left the
text box for Import As blank.
This means that the created Cells object Fibo is imported as
the same name as Fibo to the MxConsole’s namespace.
Type Fibo[10] in the MxConsole (Fibo(10) also works):
>>> Fibo[10]
55
55, the 10th Fibonacci number is output.
Its values are calculated automatically by the associated Formula, when the cells values are accessed. Note that values are calculated not only for the specified argument, but also for the arguments that are recursively referenced by the formula in order to get the value for the specified argument.
Since Fibo[10] refers to Fibo[9] and Fibo[8],
Fibo[9] refers to Fibo[8] and Fibo[7], and
the recursive reference goes on until it stops at Fibo[1] and Fibo[0],
values of Fibo for the arguments from 0 to 10 are
calculated by just calling fibo[10].
To see for what arguments Fibonacci numbers are calculated, you can get pairs of the arguments and values in the Cells as a dictionary:
>>> dict(Fibo)
{1: 1, 0: 0, 2: 1, 3: 2, 4: 3, 5: 5, 6: 8, 7: 13, 8: 21, 9: 34, 10: 55}
or as a Pandas Series or DataFrame object:
>>> Fibo.series
n
1      1
0      0
2      1
3      2
4      3
5      5
6      8
7     13
8     21
9     34
10    55
Name: Fibo, dtype: int64

>>> Fibo.frame
    Fibo
n
1      1
0      0
2      1
3      2
4      3
5      5
6      8
7     13
8     21
9     34
10    55
Tracing calculation#
Tracing calculation is for inspecting calculation dependency. It is useful, for example, when you want to debug a calculation, and check whether the calculation is correctly based on expected values.
To trace the calculation of Fibo[10],
Bring up MxAnalyzer widget, and select Precedents tab,
and enter Fibo in the Object box,
and 10 in the Args box.
You will see an entry representing Fibo[10] appears in the widget.
Click the arrow heading to unfold the entry, and you will see
Fibo[9] and Fibo[8] entries branching off Fibo[10].
By unfolding precedents entries recursively, you can trace
the calculation of Fibo[10] many steps back till the
trace reaches Fibo[1] and Fibo[0].
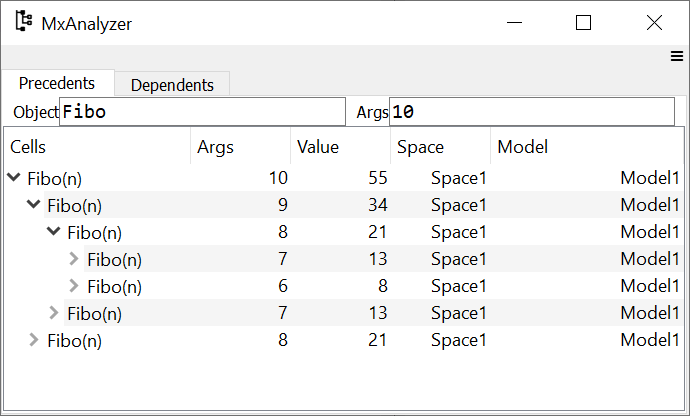
MxAnalyzer Precedents Tab#
In the same way, you can also trace dependents of an element of Fibo,
say Fibo[5], in the Dependents tab.
The dependents are those elements whose calculation uses the value
of Fibo[5] directly or indirectly.
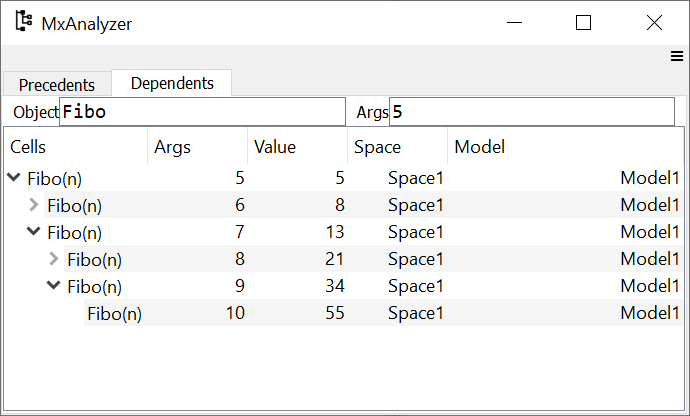
MxAnalyzer Dependents Tab#
Overriding calculation by input#
Cells values can be assigned by the user. When the user assigns values for certain arguments, then the assigned values take higher priority over formula calculation. Let’s see how this works.
Now the Cells Fibo has values for n=0, ... ,10.
We are going to replace the value for n=0 from 0 to 1,
by assigning 1 to Fibo[0].
>>> Fibo[0] = 1
Then check all the values held with Fibo:
>>> dict(Fibo)
{1: 1, 0: 1}
You see that for n=2, ..., 10, the values are cleared.
This is because the values for n=2, ..., 10 are calculated
recursively by ultimately referring Fibo[1] and Fibo[0].
Since Fibo[0] was updated by your input,
all the dependent values are cleared.
Get values of Fibo up to n=10 again:
>>> Fibo[10]
89

>> dict(Fibo)
{1: 1, 0: 1, 2: 2, 3: 3, 4: 5, 5: 8, 6: 13, 7: 21, 8: 34, 9: 55, 10: 89}
Now you see that the value for n=10 is 89, which was the value
for n=11 before changing Fibo[0].
Saving the work#
The last step is to save the Model we created. Bring up the context menu in MxExplorer by right-clicking in the widget, and select Write Model item.
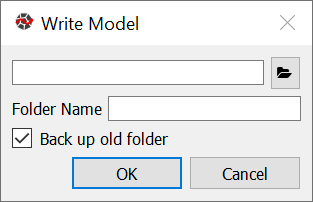
Write Model Dialog Box#
The line box at the top is to select the location to place the model folder. Clicking the folder button and select the folder you want to place the model. The model will be saved into multiple files, in a folder placed under the selected location. Enter the folder name in the Folder Name box. We’ll name the folder FiboModel here, but you can name it as you like.
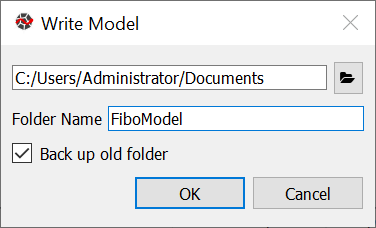
Write Model Dialog Box#
If the check box labeled Back up old folder is checked and there is a folder with the same name, the folder is renamed with the suffix _BAK followed by a number, such as FiboModel_BAK1, before the new folder is created. Since there is no folder named FiboModel in the location, the check box has no effect. Click OK to save the model.
Now let’s check if the saved model can be loaded back. From the context menu in MxExplorer, select Read Model and the Read Model dialog box shows up.
Select the model folder from the folder button. The Model Name box is to specify a Model name, if you want to name the new Model different from the saved name. The Import AS check box is to indicate whether to define a global name for the Model, and to specify the variable name. If left blank, the variable name is set equal to the Model name.
For this exercise, let’s leave Model Name blank and Import As checked and blank, and see what happens.
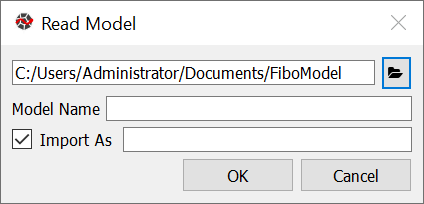
Read Model Dialog Box#
The new model becomes available as Model1 and the old model
is renamed to Model1_BAK1 as you can check
in the Model box in MxExplorer.
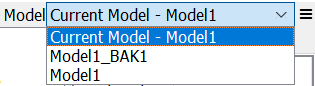
Model list#
Note that the global variable Fibo in MxConsole sill points
to the Cells in the old model, Model1_BAK1:
>>> Fibo
<Cells Fibo(n) in Model1_BAK1.Space1>
The Fibo Cells in the new Model can be accessed as Model1.Space1.Fibo,
so redefine Fibo to point to the new Cells:
>>> Model1.Space1.Fibo
<Cells Fibo(n) in Model1.Space1>

>>> Fibo = Model1.Space1.Fibo
Now, let’s examine Fiob’s values before calculation.
>>> dict(Fibo)
{0: 1}
You see that only the value input by you is remembered, and the calculated values were not saved. You can check you get the same values as the old model:
>>> Fibo[10]
89

>>> dict(Fibo)
{0: 1, 1: 1, 2: 2, 3: 3, 4: 5, 5: 8, 6: 13, 7: 21, 8: 34, 9: 55, 10: 89}